

Autologous chondrocyte implant surgery of the knee
Cirugía de implante de condrocitos autólogos en rodilla
Introduction
Many surgical techniques are used in an attempt to repair damaged joint cartilage(1). The most common procedures are bone marrow stimulation techniques that involve bleeding of the subchondral bone to produce lesion repair. These techniques have been widely used in their different versions: perforations, microfractures or nanofractures - but the results are short-lasting, and good outcomes are only achieved in the case of small lesions. As an alternative to such procedures, different restoration techniques have been developed which - as their name indicates - seek to restore the structure and thus also the function of the affected tissue. These techniques comprise mosaicplasty, osteochondral grafts and cell therapy methods.
This surgery video presents a cell therapy technique that is able to regenerate the damaged tissue (the cartilage), and moreover constitutes an autologous procedure, i.e., it produces no patient immune response(2).
Indications
- Outerbridge grade III-IV lesions(3).
- Injuries of the hip, knee and ankle.
- Patients between 18-55 years of age.
- Rescue treatment in cases of failed techniques.
Contraindications
- Active infection.
- Tumours.
- Associated diseases: these should be treated first.
- Patients over 55 or under 18 years of age.
Surgical technique
Autologous chondrocyte implantation technique is performed in two surgical steps (Table 1).
reaca.28171.fs2002012en-table1.png
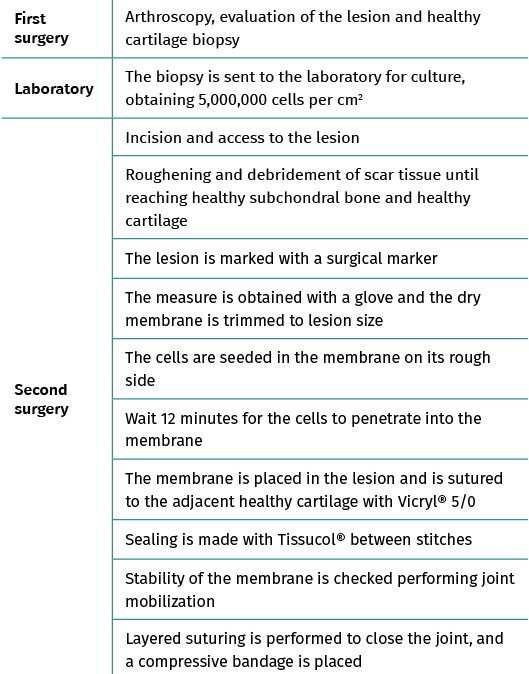
Table 1. Autologous chondrocyte implant surgery
First surgery involves arthroscopy of the damaged joint. It assesses the chondral lesion to be treated and confirms whether it is amenable to the chondrocyte implantation technique (Figures 1 and 2). Other procedures are also carried out if needed, such as for example reconstruction of the anterior cruciate ligament, partial meniscectomies, meniscus implantation, patellar realignments, osteotomies, etc. Lastly, the cartilage sample is taken from a non-weight bearing zone (intercondylar zone or internal femoral condyle at its upper margin). The sample is extracted with biopsy forceps or, alternatively, using discectomy forceps. Between 3-4 rice grain-sized fragments of healthy cartilage are harvested (Figure 3). The biopsy material is placed in a sterile receptacle containing a culture medium (DMEN) (Figure 4). The material is kept at room temperature and is shipped to the laboratory as quickly as possible. A form should be completed (Figure 5), stating the joint, the location of the lesion and the size of the defect. Once in the laboratory, the sample is processed and cultured. After 4-6 weeks (depending on the case), the culture is ready for implantation.
reaca.28171.fs2002012en-figure1.png
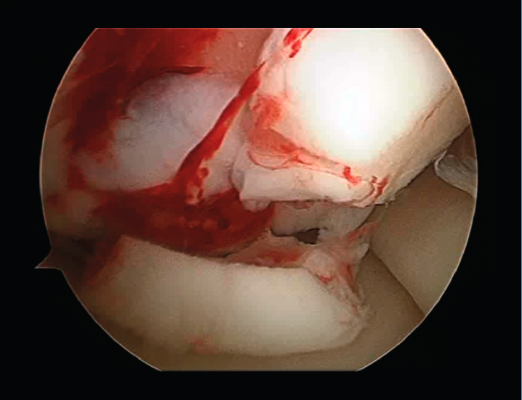
Figure 1. Arthroscopic view of an Outerbridge grade IV acute chondral lesion of the internal femoral condyle.
Second surgery involves implantation of the chondrocytes. This is done by open surgery, though in some cases an arthroscopic approach can be used if allowed by the size or location of the lesion. The procedure involves the following steps:
- A paramedial joint incision is made, with luxation of the knee and access to the lesion (Figure 6).
- The damaged cartilage is cleaned using curettes, with debridement of the defect, and the lesion is left with healthy and exposed subchondral bone (Figure 7).
- A surgical marker is used to mark the margins of the lesion, and a mould of the lesion is obtained with a piece of glove (Figure 8).
- Patellar reduction is then performed, a humid dressing is placed in the joint, and cell implantation in the membrane is carried out.
- The glove is cut along the mark on the instrument table, checking again that the measurement is correct. The dry membrane is trimmed to the size of the lesion. The membrane is placed with the rough zone facing upwards (Figure 9). The cells are received from the laboratory in a sterile jar. Using a sterile pipette, all the cells are placed on the membrane, distributing them well over the entire surface(4) (Figure 10).
- We have to wait 12 minutes for the cells to penetrate into the membrane (the specific time will be indicated by the membrane laboratory).
- We then return to the joint, wash it, and carefully dry the lesion bed to ensure the absence of bleeding.
- The membrane is placed in the lesion and the margins of the former are sutured to the healthy cartilage with Vicryl® 5/0 (Figures 11 and 12).
- We check that the membrane is well fixed and seal between the stitches with Tissucol® (Figure 13). A waiting period of 3-5 minutes is observed, and the joint is mobilized before closure to check that the membrane does not detach with movement of the joint.
- Layered suturing is performed to close the joint, and a compressive bandage is placed.
reaca.28171.fs2002012en-figure2.png
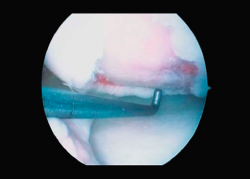
Figure 2. Arthroscopic view of an Outerbridge grade IV chronic chondral lesion of the internal femoral condyle.
reaca.28171.fs2002012en-figure2.png

Figure 2. Arthroscopic view of an Outerbridge grade IV chronic chondral lesion of the internal femoral condyle.
Postoperative period
The patient must spend two months without weight bearing, though the knee can be mobilized to preserve mobility and a good joint range. Gradual weight bearing starts after two months, with crutches. After 2-4 months, physiotherapy starts to restore normal joint range and support the extremity. Exercises against resistance, together with static bicycling and swimming, begin after four months.
reaca.28171.fs2002012en-figure3.png
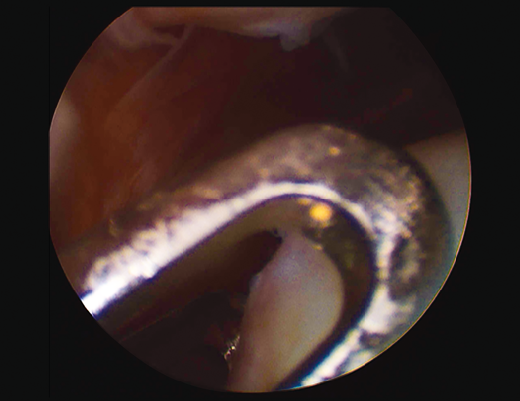
Figure 3. View showing biopsy of the cartilage of the internal femoral condyle, internal and upper margin.
Limb strengthening with weights can begin after 6 months. Jump and subsequently running training starts after 10 months, and contact sports can begin after 12 months.
reaca.28171.fs2002012en-figure4.png
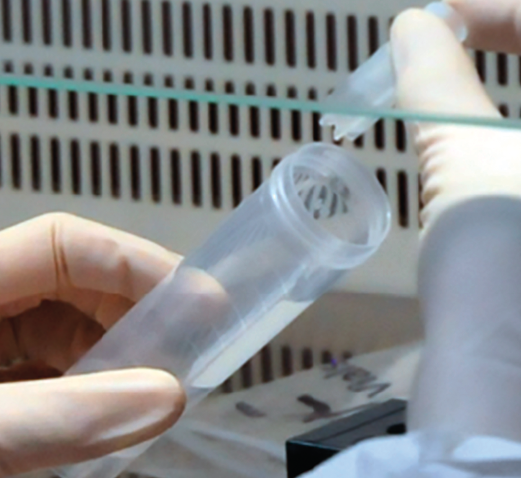
Figure 4. The biopsy material is placed in a sterile tube with DMEN.
Results
All our patients undergo controls and study. We use the International Knee Documentation Committee (IKDC) questionnaire before surgery, after 6 months, and then every year(5). In addition, magnetic resonance imaging (MRI) controls are made at 3, 6 and 9 months, and one year. Annual controls continue thereafter. On the other hand, demographic and clinical data are compiled on occasion of the periodic review visits(6).
reaca.28171.fs2002012en-figure5.png
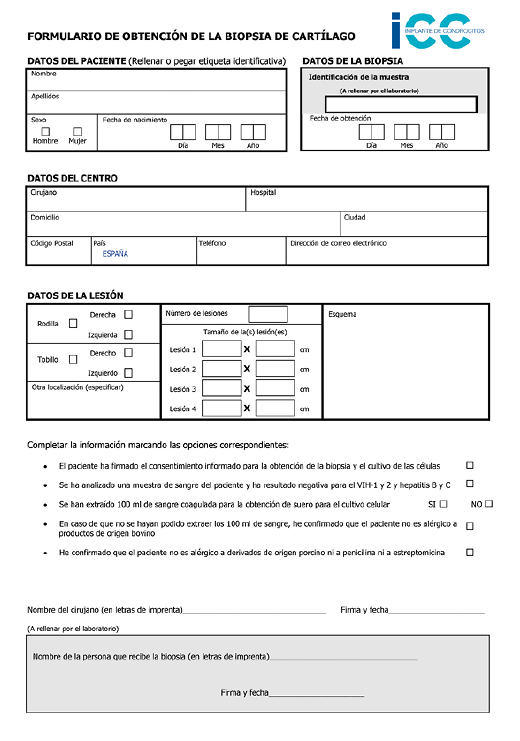
Figure 5. Form for obtaining the cartilage biopsy.
All the results are studied and entered in our database to allow follow-up and assessment of the technique. Our results are also compared against those of other authors(7).
reaca.28171.fs2002012en-figure6.png
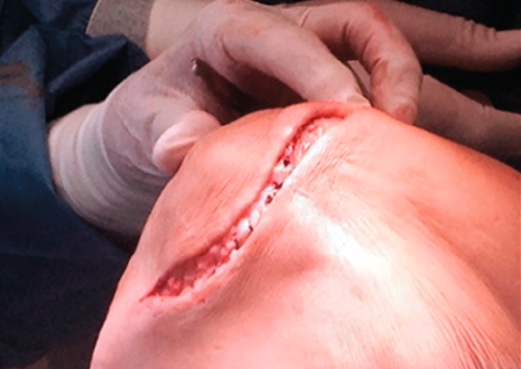
Figure 6. Internal paramedial incision of the knee.
The results of our group were published in Cartilage in 2018(8). They correspond to the first 50 patients treated with the autologous cartilage implantation of the knee technique and with a minimum follow-up period of two years. The mentioned publication evidences improvement of the visual analogue scale (VAS) and IKDC score one and two years after surgery, with statistically significant differences.
reaca.28171.fs2002012en-figure7.png
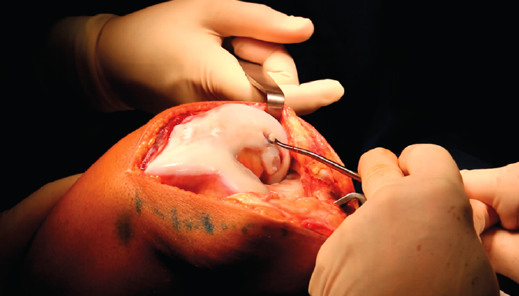
Figure 7. Debridement of the damaged cartilage.
reaca.28171.fs2002012en-figure8.png

Figure 8. Lesion marked with a surgical marker, and its measurement.
reaca.28171.fs2002012en-figure9.png
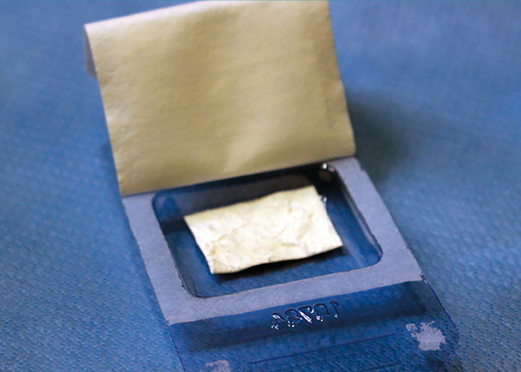
Figure 9. View of the dry membrane with the rough side facing upwards.
Possible complications
In our case series there were no implant detachment or delamination problems, though such situations have been reported by other authors. We have recorded cases of arthrofibrosis, with difficulty gaining mobility, that were resolved through arthroscopic arthrolysis. We also have had cases that have not shown clinical improvement.
reaca.28171.fs2002012en-figure10.png

Figure 10. A: the cells are collected with the pipette; and B: the cells are distributed over the previously trimmed membrane.
Conclusions
Autologous chondrocyte implantation (Instant CEMTRO Cell [ICC]) is effective for the treatment of knee cartilage defects measuring over 1.5 cm2 in size, affording significant reduction of pain, effusion and crepitus, and increasing mobility over follow-up.
reaca.28171.fs2002012en-figure11.png
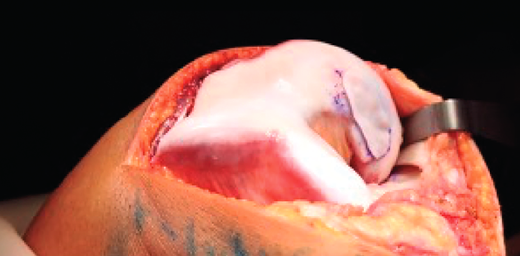
Figure 11. Membrane placed in the lesion.
According to subjective patient perception as assessed with the IKDC questionnaire, both knee symptoms and function improve significantly with high-density chondrocyte implants at one and two years after implantation.
reaca.28171.fs2002012en-figure12.png

Figure 12. Membrane suturing to the margins of the healthy cartilage.
The MRI studies evidence correct implant integration after two years. These imaging studies also show a reduced number of bone edemas versus the reports of other investigators, particularly in comparison with the MACI (matrix-assisted autologous chondrocyte implantation) technique.
reaca.28171.fs2002012en-figure13.png
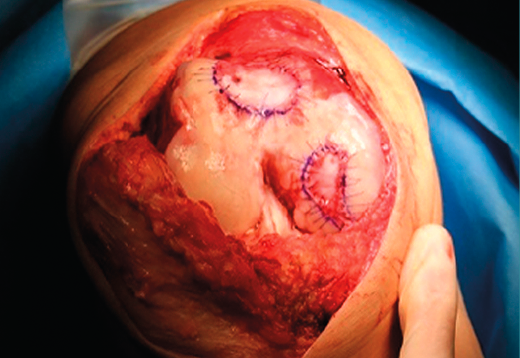
Figure 13. Final view of the membranes sutured in the lesion.
The small percentage of patients with complications recorded after follow-up shows that autologous chondrocyte implantation (ICC) is safe for the treatment of chondral lesions and may be regarded as a rescue option when other techniques have failed.
Annexed material. Surgery video: chondrocyte implantation
Tablas
Table 1. Autologous chondrocyte implant surgery
Figuras
Figure 1. Arthroscopic view of an Outerbridge grade IV acute chondral lesion of the internal femoral condyle.
Figure 2. Arthroscopic view of an Outerbridge grade IV chronic chondral lesion of the internal femoral condyle.
Figure 3. View showing biopsy of the cartilage of the internal femoral condyle, internal and upper margin.
Figure 4. The biopsy material is placed in a sterile tube with DMEN.
Figure 5. Form for obtaining the cartilage biopsy.
Figure 6. Internal paramedial incision of the knee.
Figure 7. Debridement of the damaged cartilage.
Figure 8. Lesion marked with a surgical marker, and its measurement.
Figure 9. View of the dry membrane with the rough side facing upwards.
Figure 10. A: the cells are collected with the pipette; and B: the cells are distributed over the previously trimmed membrane.
Figure 11. Membrane placed in the lesion.
Figure 12. Membrane suturing to the margins of the healthy cartilage.
Figure 13. Final view of the membranes sutured in the lesion.
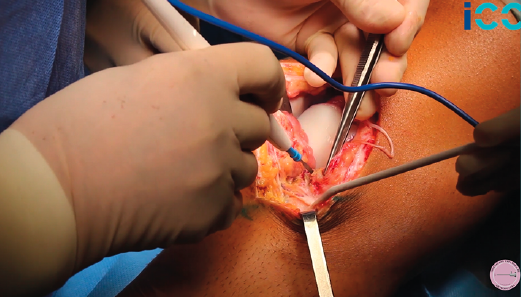
Figure 14. Surgery video: chondrocyte implantation.

Información del artículo
Cita bibliográfica
Ethical responsibilities
Conflicts of interest. The authors declare that they have no conflicts of interest.
Financial support. This study has received no financial support.
Protection of people and animals. The authors declare that the procedures carried out abided with the ethical standards of the responsible human experimentation committee and in accordance with the World Medical Association and the Declaration of Helsinki.
Data confidentiality. The authors declare that the protocols of their centre referred to the publication of patient information have been followed.
Right to privacy and informed consent. The authors declare that no patient data appear in this article.
Descargar artículo:
Licencia:
Este contenido es de acceso abierto (Open-Access) y se ha distribuido bajo los términos de la licencia Creative Commons CC BY-NC-ND (Reconocimiento-NoComercial-SinObraDerivada 4.0 Internacional) que permite usar, distribuir y reproducir en cualquier medio siempre que se citen a los autores y no se utilice para fines comerciales ni para hacer obras derivadas.
Comparte este contenido
En esta edición
- Update on the treatment of focal cartilage lesions of the knee
- Comparison of the intraarticular injection of platelet rich plasma (PRGF®) and hyaluronic acid (Hyalone®) in the treatment of chondral lesions: a randomized, prospective clinical study
- Microfractures or bone marrow stimulation (BMS): evolution of the technique
- Fresh osteochondral graft. Indications, surgical technique and scientific evidence
- Autologous matrix-induced chondrogenesis (AMIC)
- Instant CEMTRO Cell (ICC), high density autologous chondrocytes implantation
- Regeneration of joint cartilage: perspectives and future
- Autologous chondrocyte implant surgery of the knee
- Full thickness chondral ulcers of the patella and femoral condyle of the knee
Más en PUBMED
Más en Google Scholar
Más en ORCID

Revista Española de Artroscopia y Cirugía Articular está distribuida bajo una licencia de Creative Commons Reconocimiento-NoComercial-SinObraDerivada 4.0 Internacional.